The Handsomest, most Amazing man in the World, my boyfriend Adam (yes, I might be a teensy bit bias in this regard, but I'm ok with that) recently had a birthday.
He decided to throw himself a board game party and invited all his friends.
I, of course, loving themed treats, scoured the internet for ideas for game themed cupcakes, but found I didn't come away very inspired.
Adam asked that I make him Oreo cupcakes instead. I've been meaning to make him some Oreo treats for awhile now, so I jumped at the idea. I looked at lots of recipes and finally decided to do it my own way.
For the cake I used the Vanilla Tex Mex recipe, but cut way back on the cinnamon. Instead, I got a bag of mini Oreos and cut them into small chunks, middle stuff and all and mixed them into the batter.
I placed a full sized Oreo cookie at the bottom of each baking cup, then filled the rest with batter.
Like the Tartcuppins, having something at the bottom of your cake makes the baking time change. The heat doesn't penetrate the same. I ended up baking them for about 10 minutes longer and then broiling the top of them, hence the slightly browned look.
mmm... look at those big Oreo chunks...
For the icing, I wanted to do something special. I looked up recipes for homemade Oreo's and used the recipe for "the middle stuff" from Sally's Baking Addiction, tripled the recipe and made it into icing.
1/4 cup (60g) unsalted butter, softened to room temperature
1/4 cup (48g) vegetable shortening, room temperature
1 and 3/4 cups (210g) confectioners' sugar
1 teaspoon vanilla extract
In a small bowl using a handheld or stand mixer with a paddle attachment, beat the butter and shortening together on high speed until creamy and combined, about 1 minute. Turn the mixer off and add the confectioners' sugar and vanilla. Beat on low for 1 minute and then switch to high and beat for 1 more minute until creamy and combined. The cream filling is thick.
I tweaked this recipe, using a bit of milk, a bit more vanilla and Oreo crumbs until I found a taste that I felt worked.
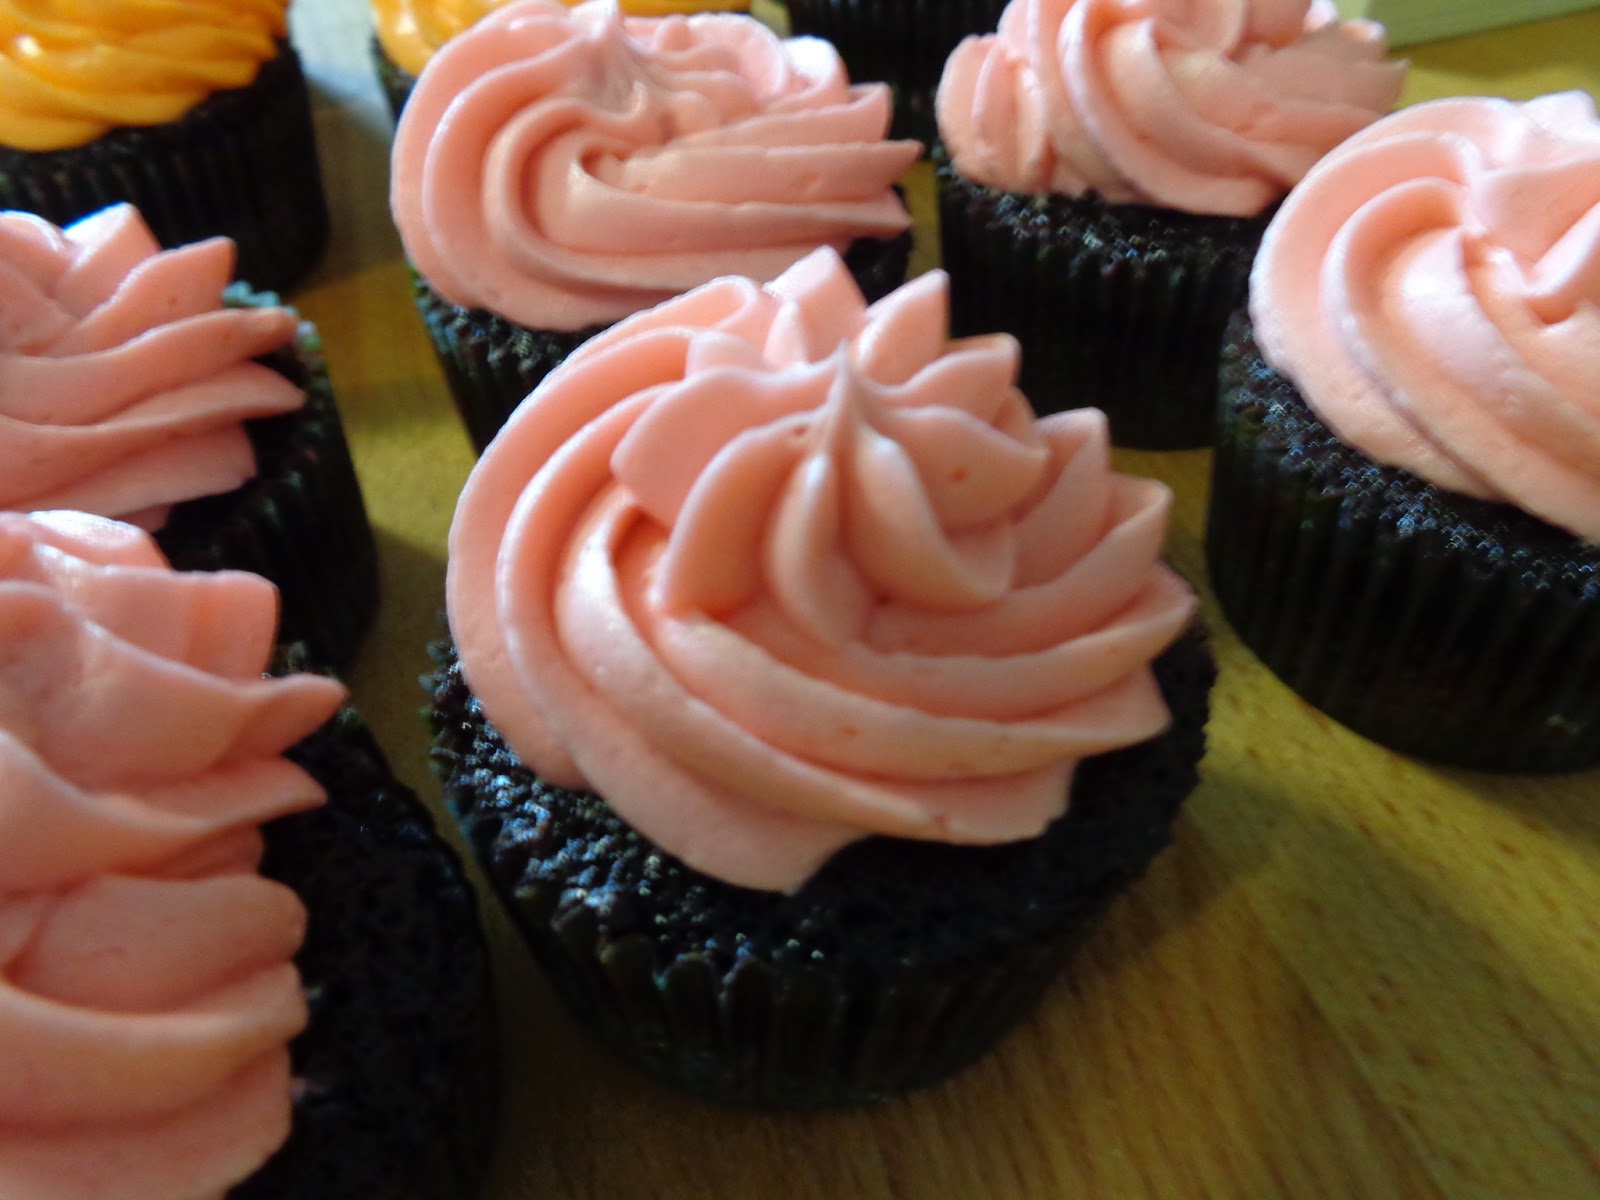
Once the cupcakes were iced, I placed the remaining mini Oreos on top as garnish.
Don't they look good?
Check out what they look like inside. You can see the Oreo at the bottom, which had softened nicely in the oven.
These cupcakes were heavenly! I made about 24 all together and all but 2 or 3 were left at the end of the night, which was pretty good, since there were only 7 of us there. The remaining cupcakes were gone the next morning and made a terrific breakfast ;)
It's been a quiet few months here. After Christmas and New Years are both over, everyone seems to go into hibernation mode. Well, at least here in Canada, where it has been a super cold and dreary winter.
Everyone hides and inside and there are very few reasons to bake or use the new cupcake book and supplies that I got for Christmas.
Yes, I was the lucky recipient of a William-Sonoma gift-card this Christmas!
The first thing I bought was this amazing cupcake book.
That was quickly followed by a jar of rose water and a jar of orange blossom water. I have been looking for those everywhere!
As St. Patrick's Day approached, my work's social committee decided to have a comfort food pot-luck. And what is more appropriate for me than to make cupcakes?
Since I really wanted to use the new stuff that I had got, I decided to make these!
(sorry, I forgot to take process shots again)
Rose Water and Raspberry Cupcakes
1 1/4 cups all-purpose flour
1 tsp baking powder
1/4 tsp salt
3/4 cup confectioners' sugar
1/2 cup unsalted butter, at room temperature
1 tbsp rose water
2 large eggs, at room temperature
1/2 cup whole milk
Position oven rack in the middle of oven; preheat oven to 350°; line a standard 12-cup muffin pan with paper or foil liners.
In a small bowl, whisk the flour, baking powder, and salt together; set aside.
In another bowl, with an electric mixer on med-high speed, beat the powdered sugar and butter together until light and fluffy, 2-3 minutes.
Add in rose water and the eggs, one at a time, beating on low speed until combined after each addition.
Add in the flour mixture in 3 additions, alternating with the milk in 2 additions, beating on low speed until just combined; scrape down the sides of the bowl as needed.
Divide the batter evenly among the prepared muffin cups, filling each about 3/4 full.
Bake until lightly golden and a pick comes out clean, 15-18 minutes.
Let the cupcakes cool in the pan on a wire rack for 5 minutes; transfer the cupcakes to the wire rack to cool completely, about 1 hour
Rose Water Glaze
1 cup confectioners' sugar
1 tbsp while milk, plus more as needed
1 tsp rose water
2 drops red food colouring
Make the glaze--in a bowl, whisk the sugar, milk, rose water, and food colouring together until smooth; the glaze should be spreadable. If too thick, whisk in additional milk a few drops at a time. If too thin, whisk in additional sugar, one teaspoon at a time; use right away.
Spoon the glaze over the cupcakes (the glazed cupcakes can be refrigerated in an airtight container for up to 3 days; bring to room temperature before finishing).
Top each cupcake with the fresh raspberries and sugared rose petals (if using), dividing evenly, and serve.
Don't they look super pretty?
They were really delicious, although a bit intense with the rose water. I would cut it back a bit next time.
These weren't really the right thing to take to a comfort food pot-luck. They are a little too fancy for that. They would be much better suited for an afternoon high tea.
Now, this is a catchy tune on it's own, but it gets even catchier when Feast of Fiction sings it.
Ok, ok, so I'm not actually making pancakes, but when I got this song stuck in my head for over a month (your welcome) it started to involve into other things, and bacon cupcakes was one of them.
For Christmas I made my friend John some Maple Bacon Cupcakes by Bacon Today and sang this song through the whole process. Also, I was so caught up in singing and baking that I forgot to take process shots. Sorry :(
But his recipe is too good not to pass on!
Bacon Maple Cupcakes
(makes about 6 cupcakes so you might want to double or triple the recipe)
4 1/2 tablespoons butter, room temperature
1/2 tablespoon bacon drippings (left in the fridge to become solid)
1 egg
5 tablespoons brown sugar
4 tablespoons maple syrup
1 1/4 cups self rising flour
1 teaspoon baking soda
1/2 teaspoon baking powder
tiny tiny pinch kosher salt
1/4 cup milk
1/4 cup of minced (maple) bacon, cooked and drained
Cook some bacon in a fry pan (about 6 thick strips). Reserve the drippings and place in the fridge to solidify. Mince 1/4 a cup of the bacon.
The chef should eat whatever is left to assure that the bacon is tasty.
Beat the crud out of the butter and solidified bacon fat ’till light and creamy.
Add the brown sugar and maple syrup and beat well until combined.
Add the egg and beat until incorporated.
Sift the flour, salt, baking soda and powder together.
Add some of the flour and mix, then some of the milk, then continue to alternate the dry and wet ingredients, ending with the dry. Mix until just combined.
Fold in the bacon.
Taste and add more maple syrup, flour, or milk if needed for desired taste. Keep in mind the maple frosting is very sweet, and to add in very small increments for alterations as maple syrup in large amounts can break a cake batter.
Scoop into cupcake papers and bake at 350 F for 18-22 minutes or until a toothpick comes out clean. Be sure to rotate the pan after the first 15 minutes for even baking.
Maple Syrup Frosting
(Again, this doesn't make much, so you'll want to make extra)
4 tablespoons of butter.
2 tablespoons of maple syrup.
1 cup of powdered sugar.
turbinado sugar (optional, but recommended).
coarse grain sea salt (optional, but recommended).
Combine the syrup and butter until combined.
Add the sugar, a bit at a time, and whip at high speeds until combined.
Pipe or spread onto cupcakes.
Sprinkle on sea salt and turbinado sugar for decoration and a lot of added flavor.
(add some crumbled BACON TOO!)
I didn't add any of the extra bits, since it already looked so good.
The cupcakes themselves look a little dark, but that's the added maple to the batter.
They were really quite good, which surprised me. I was worried that they would be strange.
These make the perfect gift or a really great pot-luck dessert that will keep people talking.
If you decide to try these, let me know how it goes!
Who doesn't love Doctor Who? New or Old, there is something for everyone.
Even us bakers.
In honour of 50 years of Doctor Who and the anniversary special airing this weekend, Lakeland is offering these amazingly geeky bakewares for us Whovians
Dalek Cupcake Wraps and Toppers
Disguise your cupcakes as delicious Daleks! The stars of our front cover, a batch of simple cupcakes can be easily transformed into a host of the Doctor's arch enemies.
Comprises 24 cake wraps and 24 toppers – 6 of each colour.
Doctor Who Dusting Set
Finish off your cakes or top cappuccino and hot chocolate with these dusting shields.
Dalek Cake Mould
Once a year, hostilities between The Doctor and the Daleks are halted and they sit down together to exterminate a cake. Our silicone mould enables you to make an intricately shaped Dalek cake all ready for decorating. Perfect too for a giant Dalek jelly!
Doctor Who Cake Pan
With indentations for creating six of the favourite characters from the show, our pan makes it easy. And because it’s made from silicone, you won’t need a sonic screwdriver to get them out.
Doctor Who Cookie Cutters
Bring some of the best-loved icons from the show to life with our polypropylene cutters that will stamp a design on each cookie, ready for icing.
And if Baking isn't your style and you want something a little more substantial for all your Doctor Who edible needs, check out this Whovian cookbook; Dining With The Doctor
Hello, sweetie.
Your taste buds are about to take a wibbly wobbly, timey wimey adventure through the Doctor Who reboot. Megafan and food writer Chris-Rachael Oseland spent a year rewatching all of series one through six and experimenting in her kitchen to bring you a fresh recipe for every single episode.
This book is a treat for any Whovian who wants to offer more than a plate of fish fingers and a bowl of custard at your next viewing party. Want to host an elegant dinner party to show off your new Tardis corset? Start the evening with a Two Streams Garden Cocktail followed by Baked Hath, Marble Cucumber Circuits with Vesuvian Fire Dipping Sauce, Professor Yana’s Gluten Neutrino Map Binder, Slitheen Eggs, and some of Kazran’s Night Sky Fog Cups for dessert.
If you’re just getting a few friends together to watch the latest episode, why not offer them an Ood Mezze Plate to munch on as stragglers wander in followed by some quick and easy Fish Custard Tacos, Open Faced Dalek Ironsides, Sontaran Soldiers, and a Cinnamon Pull Apart Crack in the Wall. They can wash it all down with a cup of the Pond’s Wedding Punch.
Lets be honest. No Whovian gathering is complete without them, so you also get an entire bonus chapter dedicated to interesting alternative takes on fish fingers and custard.
This comprehensive cookbook includes eighteen adult beverages, more than two dozen recipes for vegetarians, twenty that are safe for people with wheat allergies, and ten for the low carb dieters. You’ll be prepared for every possible guest.
The ebook also includes over 50 full color photos, a linked table of contents for easy navigation, and a useful appendix.
Put on your fez and straighten your bow tie. You own a cookbook now. Cookbooks are cool.
Geronimo!
I really want to throw a Doctor Who theme party and make all of this stuff! Sadly I will not be hosting one this weekend due to the fact that I'm still a season behind! I know! I can hardly believe it!
For those of you who are new to the Who, I'm excited to say that you can now find it on Canadian Netflix! Woohoo!
Anyway, for you who are watching this weekend, enjoy!
I know I haven't been posting lately, but I honestly haven't had much time to bake or blog. Considering that I work silly hours, by the time I get home, I'm wiped and mostly just want to go to bed. If I do manage to get something baked, I'm usually still baking after midnight, which isn't as much fun as it sounds.
Most of my baking, these days, stems from celebrations. This one, in fact, was Canada Day and also my 1 year anniversary with my sweetheart.
I was trying to think of some sort of Canadian flavor I could make, but the best I could come up with was maple/bacon. And as much as I would like to try that one day, I wasn't really in the mood for it. After rifling through cookbooks for awhile, Adam asked how The Challenge was going. To be honest, I've veered away from it as of late due to a total flop recipe, which I didn't even bother to blog about. (boo to you Taste of Summer the Way It Used to Be - Peachy) I'm also getting to the weird flavors in the book and I know they'll be great for some random occasion, but that occasion hasn't come up yet.
That's where I found Bittersweet Paris. I've been wanting to try this one for awhile and it lent itself well to making it lactose-free.
5 tbsp butter
1 cup coffee
1 cup buttermilk
2 eggs, room temperature
1 1/2 cups sugar
1 cup cake flour
1/2 cup cocoa powder
1 tsp finely ground salt
1 tsp baking powder
1 1/2 tsp baking soda
2 tsp vanilla extract
Preheat the oven to 350' F. Place 12-15 paper liners into cupcake trays.
Make the coffee. When it's ready, melt the butter into it. Whisk in the buttermilk (or in my case, almond milk). Set aside.
it separates, so you mix it back together from time to time.
Put the eggs and sugar in another bowl and mix on a low speed. Gradually add one at a time - flour, salt, cocoa powder, baking powder and baking soda. Mix until just combined.
Add the vanilla and coffee mixture. Mix until combined.
Pour batter into paper liners. Fill almost to the top.
Yes, it totally is just liquid. I was worried, but I decided to see if the recipe would work, so I popped them into the oven instead of giving up.
Look! They're rising!
Bake 15-20 minutes, or until an inserted toothpick comes out clean. I found it best that I bake them for 15 minutes, turn off the oven and leave them in there for another 10 minutes. It worked better that way. Otherwise, they were burnt on the outside and didn't cook enough in the middle.
Cool 5 minutes and then move to a baking rack.
Orange Frosting
1/2 cup (or 1 stick) unsalted butter, room temperature
1 egg yoke, room temperature
1 tsp vanilla extract
1 1/4 cups sifted powdered sugar
1 tbsp orange juice
the zest of an orange.
Cream the butter with an electric mixer until fluffy, about 3 to 5 minutes. Add egg yoke and vanilla. Beat for 4 minutes.
Add orange juice and zest. Beat 1 minute.
Add sugar (and food colouring, if you want) and beat until smooth.
This recipe didn't make a lot of icing and I had already drank the rest of my freshly squeezed orange juice, so we decided to make 2 different flavors of icing for the cupcakes. Instead of the orange juice, in the second batch, I added cherry and almond extract.
They were both really good and went with the chocolate really well. I'm not sure which one I liked better.
As soon as they were iced, it was off to the Canada Day BBQ.
I didn't get a lot of feedback on them, simply, since everyone that showed up at the party brought dessert. I ended up taking a bunch of them back home with me, which was awesome, because we ate them for breakfast the next day. Yes, I'm classy like that :P
So, what do geeks do when they mix booze and sparklers?
Everyone wore graphic t-shirts of their favorite cartoons, we threw on netflix and watched all sorts of 80's and 90's cartoons; Transformers, She-ra, Power Rangers, G.I. Joe, Sonic The Hedgehog and Jem. It was fantastic.
But what's a theme party without themed food?
We went with a breakfast theme, of course. But what do you make for a breakfast themed birthday cake? I scoured the internet for breakfast cupcakes and came across this amazing recipe from one of my favorite baking blogs; Confessions of A Cookbook Queen
picture by Confessions of a Cookbook Queen
Captain Crunch Cupcakes with Peanut Butter Marshmallow Frosting
1 box Duncan Hines Classic Yellow cake mix1 cup buttermilk4 large eggs1/3 cup oil4 cups Cap’n Crunch cereal, plus more for garnish Preheat oven to 350. Line 24 muffin tins with baking cups and set aside.Using a food processor or a
large Ziploc bag and rolling pin, crush 2 cups of the cereal very finely
(to a cornmeal consistency).
If you don't have a food processor or a rolling pin, an empty wine bottle works just as well. Who knew?
In the bowl of a mixer, add the cake mix,
crushed cereal, buttermilk, eggs, and oil.
Beat on low speed about one
minute, stopping to scrape down sides of the bowl. Increase speed to
medium and beat 2 minutes more.
Fold other 2 cups on uncrushed cereal
into the batter.
Fill liners 2/3 full and bake for 12-15 minutes or until tops spring back when lightly touched. Allow to cool on cooling racks.
To Make Frosting:
2 sticks butter, at room temperature (I used salted)1 cup peanut butter1 teaspoon vanilla1/4 cup milk4 cups powdered sugar7 oz jar marshmallow creme
In the bowl of a stand mixer,
beat the 2 sticks of butter, peanut butter, milk, and vanilla on medium
low speed until well blended.
Slowly add powdered sugar and
beat on low until just barely blended. Increase speed until medium and
beat for about 2 minutes, until light and fluffy.
Fold in Marshmallow
Creme, not fully combining to allow for a swirl of marshmallow
throughout.
Frost cupcakes generously and add a sprinkle of cereal to the top.
Note the Spiderman foils. Perfect for a Saturday Morning Cartoon Party.
I'll be honest, I was worried about this recipe. First off, I'm not one to use a box mix. I like making things from scratch, but I couldn't figure out what I needed to change by doing it from scratch, so I went with the box mix. Second, I wasn't sure how good putting cereal into cupcakes would be. But for both accounts, I was wrong. The cereal in them seemed to almost caramelize. Yum!
These cupcakes were AMAZING!!!
Everyone loved them.
The other new recipe I tried was bacon related from The Food Network
Candied Bacon
12 slices bacon, about 1/4-inch thick
Finely ground black pepper
1/3 cup light brown sugar
Equipment: 2 baking sheets, preferably the same size
Preheat the oven to 325 degrees F.
Put bacon slices in a bowl, season them with pepper and toss with
the brown sugar.
Cover a baking sheet with parchment or foil and arrange
the bacon in a single layer on top. Sprinkle any sugar left in the bowl
over the bacon.
Top with another layer of parchment or foil and top it,
squarely, with another baking sheet. The baking sheet will flatten the
bacon as it cooks.
Place the tray in the center of the oven and bake for 20 minutes.
Check the bacon by lifting the top tray and parchment. If it is not
golden brown and fairly crispy, resist the temptation to turn up the
oven temperature, and cook it for 10 to 15 minutes longer. Check it
again. Keep in mind that when you remove the tray and transfer the bacon
to a serving platter or individual plates, the bacon will "crisp" up a
little more. Be patient!
My first batch got a little burnt, so I turned it back a bit for the other batches. (sorry, I only got a picture of the burnt batch)
It was really, really good. But by the third batch, the smell of it was getting to me and I didn't end up having more than a few pieces. Of course, there was none left over for me to try again the next day.
Other party foods that we served were mini bagels, berries, pancakes, hash-browns and nutella and peanut butter sandwiches. Sooooooo gooood!!!


